Wednesday, December 17, 2014

Quick Cookies During Crazy Holidays!


Tis the season for baking cookies!  Aaaannnd about a billion other things that you have to get done before the Big Day.  There's shopping, list making, decorating, and last minute hoopla, all on top of your regular daily hustle and bustle.  So who's got time for baking?  Don't worry, this blog post is going to be all about baking creative goodies in a way that you can be efficient, have fun, and have something in time to bring to the Holiday office party.

This is usually my time of all day/night crazy baking.  And even though I greatly enjoy my holiday baking extravaganza, I just didn't have the time and energy I usually do to do it this year.  But I wanted to bring something fresh and new to the office, and most importantly, I needed to take some time out of my busy schedule for something that makes me happy.  So how did I reconcile this conundrum?  I theorized about this for a week or so, and decided to create one simple base batter and make several different types of cookies from it.  I only made 4 types this time, but the combinations are vast for any number of cookie concoctions you want to toy with.


There are 3 types pictured here, but the cookie dough base is just a basic sugar cookie, which you can count as a type all on its own.  From left to right, we have Butter Brickle, Andes Mint, and Candy Cane cookies.  Here's what you'll need to make them:


I have always made my own sugar cookies from scratch, but like I said, sometimes you need a shortcut, and this time I took it.  Betty Crocker makes a pretty good simple sugar cookie bag mix, and it's really quick and easy, but of course any sugar cookie mix will do.  So for the base dough, follow the instructions on the back of the cookie mix.  I just used one bag of "snack size" mix for each cookie type I wanted to make.  The package says it makes 1 dozen cookies, but I got anywhere from 14-16 cookies out of each bag.  All of these cookies bake at 375, so go ahead and preheat the oven.


Butter Brickle Cookies:

Follow the bag instructions for making up the batter then add the following:

1/4 cup of Heath English Toffee Bits
1/4 cup of  Kraft Caramel Bits

Lightly grease the cookie sheet with cooking spray for these.  The package says "ungreased," but you will need it because the toffee and caramel bits will stick if you don't.  Bake at 375 degrees for about 13-14 minutes or until edges are golden.  Let the cookies stand for a couple of minutes then tranfer to a wire rack or large piece of wax paper to let them cool the rest of the way.  Although, you really should shove a couple in your mouth while they are still warm and gooey because, OMG!

I forgot to add these to the "what you'll need" picture
Andes Mint Cookies:

Follow the bag instructions for making up the batter.  Here are the extra ingredients you'll need:

1/4 cup of Andes Mint Baking Chips (melted)
Extra Andes chips for topping (UNmelted)

Microwave the chips in a cup in 20 second intervals, stirring between each one, until completely melted.  Pour onto dough and quickly knead it together with your hands.  The mint chocolate will want to set up pretty fast, so I found that using my hands was fast and efficient, plus left a marbled-like pattern in the dough, which was pretty cool!  Bake for about 10-11minutes, and when they are almost done, pull the tray out and scatter a few bits of Andes on top of each cookie.  Put them back in the oven for one more minute, then remove, let stand for a couple of minutes, and transfer to the rack or wax paper to cool.  

Ok, while those are cooking, let's move on to the last batch!


Candy Cane Cookies:

Follow the bag instructions for making up the batter.  Here are the extra ingredients you'll need:

1/4 cup of Andes Peppermint Crunch Baking Chips 
2 candy canes for topping (crushed)

Add the peppermint chips to the batter and stir until everything is mixed evenly. Bake at 375 for about 10-11 minutes.  Pull the cookies out and top with crushed candy canes and bake for another minute.  Let stand for a couple of minutes and transfer to rack or wax paper to cool.


Whether you divvy them up in decorative bags or festive containers to give to others as gifts, be sure to enjoy a few yourself as a reward for all your hard work this Holiday Season.  Enjoy your cookie break with a cup of hot coffee, or better yet, a cup of warm cocoa.  Sit down, slow down, and enjoy yourself and reflect what the season brings/means to you.  


Thursday, November 20, 2014

Gobble Gobble Gravy Day


It is that time again folks!  Time for Turkey Day - otherwise known as Thanksgiving!  Traditional Thanksgiving food is my absolute favorite holiday meal. There are a few must-haves for me, and then some extra traditions that I've grown very fond of.

First off, I know people who have ham or other meats (and some non-meat entrees) for their Thanksgiving meal, but this girl MUST have turkey.  If there's no turkey, to me, it just isn't Thanksgiving.  

Second, is the mashed potatoes and gravy.  Now here's where things get seriously diversified based on the region of America you are in.  Since I'm originally a yankee from Ohio, I was raised on "yellow gravy," which is nothing more than chicken or turkey broth, (and there better be a lot of it) that is brought to a boil.  While that's happening, you put a few fork-fulls of corn starch in a measuring cup then add evaporated milk to it, stirring until smooth.  When the broth is at a rolling boil, you pour in the corn starch mixture, continuously stirring the broth.  The corn starch makes the broth thicken, then you add some seasoned salt, seasoned pepper, and a couple of drops of yellow food coloring (at least that's what my grandma and mom do), and you got yourself some Thanksgiving gravy.

However, when I moved to Oklahoma, I got an entirely new experience with what is called giblet gravy.  I haven't made it yet, but it's a broth-based gravy as well, only it has poultry parts in it and pieces of diced hard-boiled egg.  Not to mention, this gravy is apparently used in reserve, meaning -- the Ohio gravy I was raised on is cooked in a very large pot, and is consumed in large quantities, so you can fill the potato well AND drown all the rest of your food with a couple of ladles of creamy yellow gravy.  In contrast, the customary giblet gravy portion seems more like a flavorful gravy suggestion.  I admit that the giblet gravy not only freaked me out when I first tried it, but I was also disappointed that I was not having my traditional slathered feast.  I realized that gravy was more important to my traditional Thanksgiving meal than I had thought.  That being said, over the years I have grown to appreciate and even enjoy southern giblet gravy.  Thanksgiving at my dad's though, is generally gravy deficient. We've developed a tradition where instead of gravy, we have chicken and noodles as our mashed potato topper!  I know, it might sound weird, but we love it.

If there's any turkey left (don't worry, you can always make more yellow gravy), there's all kinds of stuff you can do with the leftovers - but that's another post.


Now, here's where most people would say the stuffing was an imperative part of the Thanksgiving feast.  Up until last year, I would not have been one of those people.  Believe it or not, I spent my life passing the stuffing on to the next person at the table.  Why?  Well, as a kid I hated onions, so I was not about to go anywhere near stuffing.  Then over the years I eventually came to love onions, but I still have a texture issue with their crunch, not that that has anything to do with stuffing, I'm just carrying on.  So I spent the next few years thinking about trying tiny bites here and there, and then a couple of times I actually did, but the couple of ones I tried were either too soggy, or too salty.  Then a miracle happened last year at Christmas dinner (which happened to be the same meal as Thanksgiving - I know lucky me, right?) and I tried some stuffing that I hadn't had before.  OMG!  It was soooo good!  I finally understood what everyone's deal with stuffing was!  And then, I heated up the leftovers, which were a little dry, but that's ok, because I found a good use for the giblet gravy ;)

Ok, then next is green beans, whole cranberry sauce, dinner rolls with lots of butter, and candied yams - none of which I will put above the other, because this whole meal goes together so perfectly! It is the sum of its parts.

My mom always makes her AMAZING pecan pie, and pumpkin pies as well.  If you love fall as much as I do, I'm sure you and your family have been eating pumpkin everything since like September.  When it stopped being a bazillion degrees outside and I could use my oven in good conscience again, the first thing I baked were a couple of pumpkin pies.  Even though I am all about the traditional Thanksgiving goodies, I have also just about reached my pumpkin pie quota by the end of November.  But I still like that pumpkin-ness for the feast, so I figured out something a little different.  I'm just going to leave this here for you.  I hope you enjoy!

Cream Cheese Pumpkin Pie


Ingredients:
1 package (8 oz) cream cheese – softened
1 cup pumpkin (about half a can)
1 tsp. vanilla
¾ cup packed brown sugar
1 tsp. pumpkin pie spice
1 tsp. cinnamon (plus some for dusting)
1 graham cracker crust pie shell
Whipped cream for topping (recipe found here)

Instructions:

In a large bowl, stir the softened cream cheese until it is smooth (no lumps).  Add in the pumpkin and vanilla and stir until it is smooth and creamy.  Blend in the brown sugar and spices.  Transfer mixture into the graham cracker pie shell and smooth off the top.  Cover with aluminum foil and place in the freezer for about 2-3 hours or when pie is nearly frozen.  Pull it out, decorate with dollops of whipped cream and dust with cinnamon.  Slice and serve immediately.

Friday, October 31, 2014

No Tricks, All Treats!


Today's the day, folks!  Happy Halloween!  Heading out to a party tonight?  Or trick-or-treating?  I've got some recipes to get you set up for the festivities!  First up, classic holiday gingerbread skulls! 


Ok, I admit that most people don't think of gingerbread for Halloween, but gingerbread cookies are sooo good, why would you waste 2 months waiting for it?  My answer, I don't.  Gingerbread cookies in October has been a tradition in my house for like a decade.  We can't even be bothered to put icing on them, not to say you can't, but they are so warm and soft and awesome right out of the oven! Plus I don't have that kind of will power to wait until they cool.

First thing's first, allow yourself at least 4 hours before your shin-dig to make these.  Throwing the goods together, cutting, and baking take no time at all, but the chill time of the dough is about 3 hours, so take that into consideration.

Gingerbread Halloween Cookies

Ingredients:

1/2 c shortening
1/2 c sugar
1 tsp. baking powder
1 tsp. ground ginger
1/2 tsp. baking soda
1/2 tsp. cinnamon
1/2 tsp. ground cloves
1/2 c molasses
2-1/2 c all-purpose flour
1 egg
1 Tbls. vinegar

Instructions:

Preheat the oven to 375 degrees.

In a mixing bowl, beat shortening with electric mixer for about 30 seconds.  Add the sugar, baking powder, ginger, baking sida, cinnamon, and cloves.  Beat until combined.  

Beat in the molasses, egg, and vinegar until smooth.  Then add in the flour, a little at a time, and beat with mixer until stiff.  Then use a wooden spoon or your hands to mix it the rest of the way.

Divide the dough in half.  Cover and chill for about 3 hours, then remove from fridge and continue.

Lightly grease a cookie sheet and set to the side.  On a lightly floured surface, roll out half the dough until it's about 1/8 of an inch thick.  Using Halloween themed cookie cutters, cut into desired shapes and place about 1" apart on the prepared cookie sheet.

Bake at 375 for 5-6 minutes or until edges are lightly browned. 

Repeat cutting and cooking process with the other half of the dough.  Use any scraps to make your own spooky creations!


You will probably need something to wash these down, not because they're not moist, but because I needed a segue into the next thing on my Halloween recipe list - how about some Hot Apple Cider?

Hot Apple Cider

Ingredients:

1 Gallon of apple juice 
1/4 c brown sugar
1 tsp allspice
1 tsp. whole cloves
3 stick of cinnamon

Directions:

Now, there are a few ways to do this.  You could disolve the brown sugar and allspice in a 1/2 cup of boiling water then add it to the rest of the stuff.  But in my family, we just toss everything together in a crock pot and let it simmer then serve!

I recomend the crock pot method because you can just throw and go.  You can put it on high for about an hour then on the low or "warm" setting for the rest of the evening.  Put a ladle and some mugs close by and you have yourself an all-night sipper.

And the last recipe to share with you in this post, is full of gooey goodness!


Caramel Apple Crisp

Ingredients:

4 medium apples, sliced (granny smith works best, but any mixture of tart apples will do)
1 tsp. ground cinnamon
Juice from 1/2 lemon
1/2 tsp. vanilla extract
1 sm. package individually wrapped caramels, unwrapped
2 Tbls. milk
1/4 c sugar
1/4 c brown sugar, packed
1/2 c all-purpose flour
1/2 c old-fashioned oats
1/3 c butter, softened
3/4 tsp. ground allspice

Instructions:

Preheat oven to 375 degrees.  Greese the bottom and sides of an 8-inch square pan with shortening or cooking pray, and set aside.

In a large bowl, mix together the sliced apples, lemon juice, vanilla, and cinnamon.  Transfer the apple mixture ti your prepared baking dish.  Place as many caramel squares on top of the apples as you would like, then sprinkle the milk over the caramel layer.  Set aside.

In a medium bowl, stir together the sugar, brown sugar, flour, oats, allspice, and butter until well mixed.  Sprinkle the oat mixture evenly over the caramel-covered apples.

Bake, uncovered, for about 35-45 minutes or until the topping is golden brown and the apples are tender when pierced with a folk.  Serve warm, with a dollop of ice cream, which is of course optional. The ice cream is optional, not the serving the apple crisp warm, just to be clear.  

There you have it folks!  Yummy treats for your Halloween!  Have fun, and have a very happy Halloween!


Saturday, October 11, 2014

Bevo Sandwiches With 3-Bean Chili


Well, today's the day!  The OU/Texas Red River Rivalry airs live today on ABC!

Excited?  Me too.  I know Sooner Fans already have some special tailgating goodies that are themed for this special event, and are traditionally set out on the watch table every year.  So let me just throw out some additional tailgating munchies that can add to this, and future gameday gatherings.

It's finally feeling a bit like football weather in Oklahoma, and around the country, and the chilled, crisp air makes me crave the classic combo of soup and sandwiches.  Relatively quick to make, and clean up, and can feed large groups on a budget, soup and sandwiches can also be a great tailgating addition without the grill or the mess and time constraints that sometimes comes with tailgating.

Let's start with the soup de jour!  I know I've put out a few different chili recipes, but this one is quick, easy, and very hearty - I call it 3-Bean Chili.  I've added okra and bell peppers in the past, but this one's easy enough that you can just see what you have on hand that sounds good, and toss it in! Here's what you'll need:


You will also need a pound of hamburger.  Today I used onion powder and garlic powder, but you can also use a yellow onion and garlic cloves instead, if you got 'em.  Ok, fry up your burger, adding the onion and garlic powders, chili powder, some dried parsley, and cracked pepper to the meat while it's cooking.  I unusually dice up some sort of green/hot peppers and toss them in at the same time so they can sauté in the hamburger drippings.  If you are using fresh onions and/or garlic, now is the time to cook them up as well - one pot cooking!


Once the burger is done, open a can of Red Gold Diced Tomatoes Chili Ready, and a can of Westbrea Natural Organic Vegetarian Chili Beans.  Don't drain the juices, add them to the chili.  Then add in another round of spices (add okra here if using), and let it simmer while you make the sandwiches.


In my opinion, the part of a sandwich that really determines whether it is awesome or average, is the bread.  I personally like to use hoagie style buns of different varieties, then cut them into bite-sized finger foods for parties.  Now-a-days, you can find many different selections, including pretzel hoagies and my new favorite - molasses buns!


Just look around at all the options at your local bakery or food market.  I frequent Sprouts, as you can tell by the pictures, but there are great varieties of breads everywhere, so try something you've never had reason to buy before, as long as you can slice it up into smaller bites, go for it!


Next, pick out a few different kinds of cold cuts.  I personally go with a combo of sliced turkey breast, ham, and pastrami.  They are really good together, and you can add endless toppings!  But look through the pre-packaged meat section, or go to your deli counter and get whatever takes your fancy, there are tons of options.  Pick up a couple of kinds of slices cheeses.  I always get a yellow cheese (such as co-jack or extra sharp cheddar) and most definitely pepper-jack.


Now's where you get to get creative.  Choose your toppings.  I personally pile mine up with spinach/spring greens mix, alfalfa sprouts, and avocado slices, but there is no limit to sandwich toppings, so go crazy, try new combos, layer it all up and have fun!


After you've built your culinary masterpiece, slice it into equal portions suitable for a tailgating crowd, and put them on a party tray.  Serve along side a piping bowl of chili, sit back, and enjoy the game.


  Boomer Sooner!

Monday, September 15, 2014

The University of Jell-O


Well, well, it looks like Jell-o has mass marketed these fun University Mold Kits for the football season this year!  Woo-hoo! Apparently, they made a hand-full last year, but upped the big college team kits to 16 for this season. But are these awesome looking Jiggler kits really going to be great at your tailgating/watch party event, or are they too frustrating and should only be used as a novelty MIB (that's Mint In Box for all you non-collector nerds) decoration?

Well, it seems that there is a lot of debate about this very question all over the interwebs.  Some say that the Jell-o would stick in the hard plastic molds and they wound up just scooping them out and into a paper cup, thus loosing all the school pride details that the mold promises to provide. However, some of those who got frustrated with the product admitted that they did not spray the molds with cooking spray between each use, and others said they added more water/liquid than the Jigglers recipe suggested.  That being said, those who were unsatisfied that followed suggested procedures to a 'T', reported that they still had problems getting the Jell-o out of the molds with all the details fully intact.

Now, that being said, the reviewers that I've seen at various places online (like Amazon) have given this product an overwhelming thumbs up.  The ratio of yayers to nayers is about 100 to 1.  Some of the proponents have even listed tips for easy removal, including using a toothpick instead of a knife to get the Jell-o to release easily, and making sure to spray the molds with every use.  Another tip, is to let the liquid Jell-o cool down a bit before pouring it into the mold.  And the last handy-dandy tip I've read about is after the Jell-o has set, put the bottom tip of the mold tray down into some hot water for a couple of seconds (not too long or you will get some watery goo instead of a detailed logo.

I haven't tried these tips, but it seems that using a combination of the sort will get you some Jigglers that look exactly like, or at least somewhat like the pictures on the box or on Amazon.


Let's talk about the color schemes based on OU and Ohio State.  The red (crimson/scarlet) is easy for both of these.  You can use strawberry, cherry, dark cherry, blackberry or whatever reddish Jell-o you prefer. But unless Jell-o has come out with white or gray "flavors" recently, you are going to have to get creative.

Oh, wow, how 'bout that?  They evidently HAVE come up with a way to do a "cream" colored Jell-o! And it is conveniently in the flavor of Pina Colada, for those looking to add some adult beverages to their University molds.  Yay for Sooners!  If someone has actually tried this flavor, please let me know what you think in the comments below.  There are recipes all over the internet about how to make unflavored white gelatin using evaporated milk, but that's more for layering between other flavors for decoration, not as a standalone non-flavor.  That's just gross.


Ok, now do you think we'll get this lucky with Buckeye gray?  Not exactly.  We'll need to tweek an original flavor a bit.  According to The Columbus Dispatch, this is the way to get the gray: Hey look, I rhymed! 

Ingredients
2 boxes (3 oz. each) grape-flavored Jell-O gelatin 
1 box (3 oz.) lime-flavored Jell-O gelatin 
1 can (5 oz.) evaporated milk
 
Combine 1 1/2 cups boiling water with the three boxes of gelatin and the evaporated milk. 

Ok, so now you got all your Jell-o University Mold Kit colors/flavors covered for the Sooner or Buckeye games!  Now, the question I know some of you are dying to know the answer to - Will it work for Jell-o shots?  The answer - it will, but it may not be worth the effort.  According to many people who bought these mold kits for this very reason, most have decided to just use the collegiate molds for desserts, and stick with the paper cup method for the shot version.  The main reason? Because the molds are too small and not worth the minute amount of liquor one would get from each logo block.  They claim to only get about half of an average Jello-shot in each one.  So yes, you may be able to make Jell-o shots in these molds, but whether the time, effort, and amount is worth it, is totally up to you.

They can also be used for non-Jell-o-y things such as ice cubes, chocolate, and whatever else you would normally use a plastic mold for.

Whatever you are using the molds for, be sure to get them soon, because these University kits are being sold for a limited time only!

Happy Tailgating!!!


Saturday, August 30, 2014

What's Football Without Nachos?

I have been on quite the hiatus, I know, but there is good reason.  I have gone through a diet transformation over the summer, and I haven't felt better in years!  Now, don't get confused between dieting, and changing one's diet -- totally different.  You will never, ever, see me diet, I promise you that.  The dieting craze is not a wagon I am able to hang on to, and I'm not one for starving/depriving myself in any way.  However, I have undergone a major change in my eating habits and selections, so I wanted to get a good grasp on my new relationship with food, before I came over here to share my opinions on food with you.  Don't worry, I'm not going all rabbit food and no-fun on you, I'll still be covering nachos and tailgating and restaurants,  I just may throw in some creative spins from time to time about how to eat/prepare better foods. But more on that later, we've got more important things to talk about today...

COLLEGE FOOTBALL SEASON HAD OFFICIALLY BEGUN!!!!!  WOOHOO!

Today is the day we've been waiting for, folks!  So pack up your grills, prep your goodies, and head on down to the stadium!  Or, if you are following the upswing trend of tailgating at home, get to decorating, chopping, simmering, or what-have-you.  You still have time to put up the canopy, fire up the grill, chill the beer, and decorate before your friends come over and the game starts!

Still need some ideas?  How about NACHOS?  I seriously love nachos, if you couldn't tell.  So I'm going to talk about nacho-related recipes in honor of the big day.

Do you have a copy of The Ohio State Cookbook?  Ok, turn to page 10 and find a mouthwatering recipe for Field Goal Nachos.  Or turn to page 44, for TBDBINL Taco Dip, good for dipping if your not into smothering your chips.

Field Goal Nachos
Got a copy of The University of Oklahoma Cookbook?  Page 11, OU Chili Pie, yum!  Or for dunking, try Sooner Nation Salsa on page 44.

Feel like trying something different?  How about some Baja Nachos?  This was a recipe I came up with based on that time I made my first fish tacos with Red Gold Lime Juice & Cilantro tomatoes. My Baja nacho recipe was first published in the Fall 2013 Healthy Sooner online newsletter, and can be found here.  However, I've tweeked it since then.  Here's the simpler version:

Baja Nachos

Baja Nachos
Ingredients:

3 or 4 tilapia fillets (or flounder will work too)
Melted butter (optional)
Creole seasoning (blackening seasoning)
7 oz. can (or fresh) pineapple chunks (drained)
14.5 oz. can of Red Gold Petite Diced Tomatoes w/Lime Juice & Cilantro (drained)
1 avocado (sliced)
8" flour tortillas
Cabbage
Monterey Jack cheese
Olive oil
Olive oil cooking spray

Instructions:

Ok, first, preheat the over to 375 degrees.  Use a pizza cutter to slice the flour tortillas into triangles (8 per tortilla).  Line a baking sheet with foil and use olive oil cooking spray to lightly coat the foil, then lay the triangles out in a single layer on the foil, and spray them with an even coat of the olive oil.  Put the tray in the oven for about 5 minutes, or until the tortillas begin to crisp.  Remove and set to the side.

In a medium bowl, mix the Red Gold tomatoes and pineapple together until evenly distributed and set aside.

Then, heat up about 1-2 TBLS. of olive oil on medium-high heat in a large skillet.  Rinse the fish and pat dry.  Coat the fillets in melted butter (or the olive oil- depending on if you are trying to save your calorie count for something else at the party), then coat them in the creole seasoning and fry the fish for about 3-4 minutes on each side.  Remove from heat and drain off any excess butter/oil on paper towels.  

Now, to put it all together -- Lay the baked tortilla chips out on a plate.  Break the fish fillets up into chunks and scatter them over the tortillas.  Top with cabbage, then salsa, then cheese.  Top it off with the slices of avocado and eat!

*****

Ok, that should get you started, at least in the nacho-type-stuff department.  So, enjoy today's games, friends, and food!  And have a very happy kick-off to the new football season!


Wednesday, April 30, 2014

Raw or Grilled? Koto Japanese Steakhouse & Sushi Review

Believe it or not, I did a whole lot of cooking in the month of April.  I was going to do a blog post every time I felt like I made some clever new thing that tasted good or terrible, but when I looked back through my posts over the last few months, I realized that I have only been posting about what I have been cooking, and that's it.  I thought, "Hey, I haven't done a restaurant review for a while, let's do one of those!"  Then I realized I haven't really been out to eat anywhere new this month - lol!  I have been way too busy, apparently.  However, I did remember trying out a local Japanese restaurant back in February and I have been meaning to share it with you, I just got all wrapped up in crazy time!  So, I looked through my camera and found the pics that I took during my visit, so that I could show you.


I have only had one other experience with Japanese cuisine before Koto.  That experience was at a popular Japanese restaurant in OKC, and I remember thinking the food was way too salty for me.  Since I had never had Japanese food before, I just thought it was all salty (well, not sushi, but everything else).  Needless to say, I had decided that I was not fond of Japanese food, and never felt the desire to have it again.  That was, until I went to Koto Japanese Steak & Sushi here in Norman, Oklahoma.

They have a very good sushi selection with lots of options, however, I wanted to try one of the hibachi dishes.  So, I ordered the sesame chicken and, OMG, it was delicious!  It was accompanied by some of the best stir fry veggies and fried rice that I have had anywhere.  


The "clear broth" soup had a well-balanced and unique flavor that was very complimentary to the entree.  It had the sort of saltiness that reminded me of the ocean, but it was not the kind of excessive saltiness that I experienced at that other Japanese restaurant.  The broth at Koto was simple, elegant, and quite good.


My companion ordered the Philadelphia Maki roll which contained salmon, cream cheese, and avocado. She said it was pretty good, but didn't have any special enticement for her.  It may have been the kind she ordered though, there isn't a whole lot to a Philly Roll, so maybe the different kinds would be more awesome? I didn't try it because, as ridiculous as this sounds, I'm actually trying to ease in to sushi.  I have very very little experience with it.  It's a texture thing for me so I'm going to try to overcome that by trying sushi one ingredient at a time, lol!  I WANT to like sushi, and am determined, so I will get back to you when I have conquered my texture issues with it.  For now, I have no personal opinion to offer on the sushi at Koto, but if you have eaten here and have some insight, I would love to hear it!


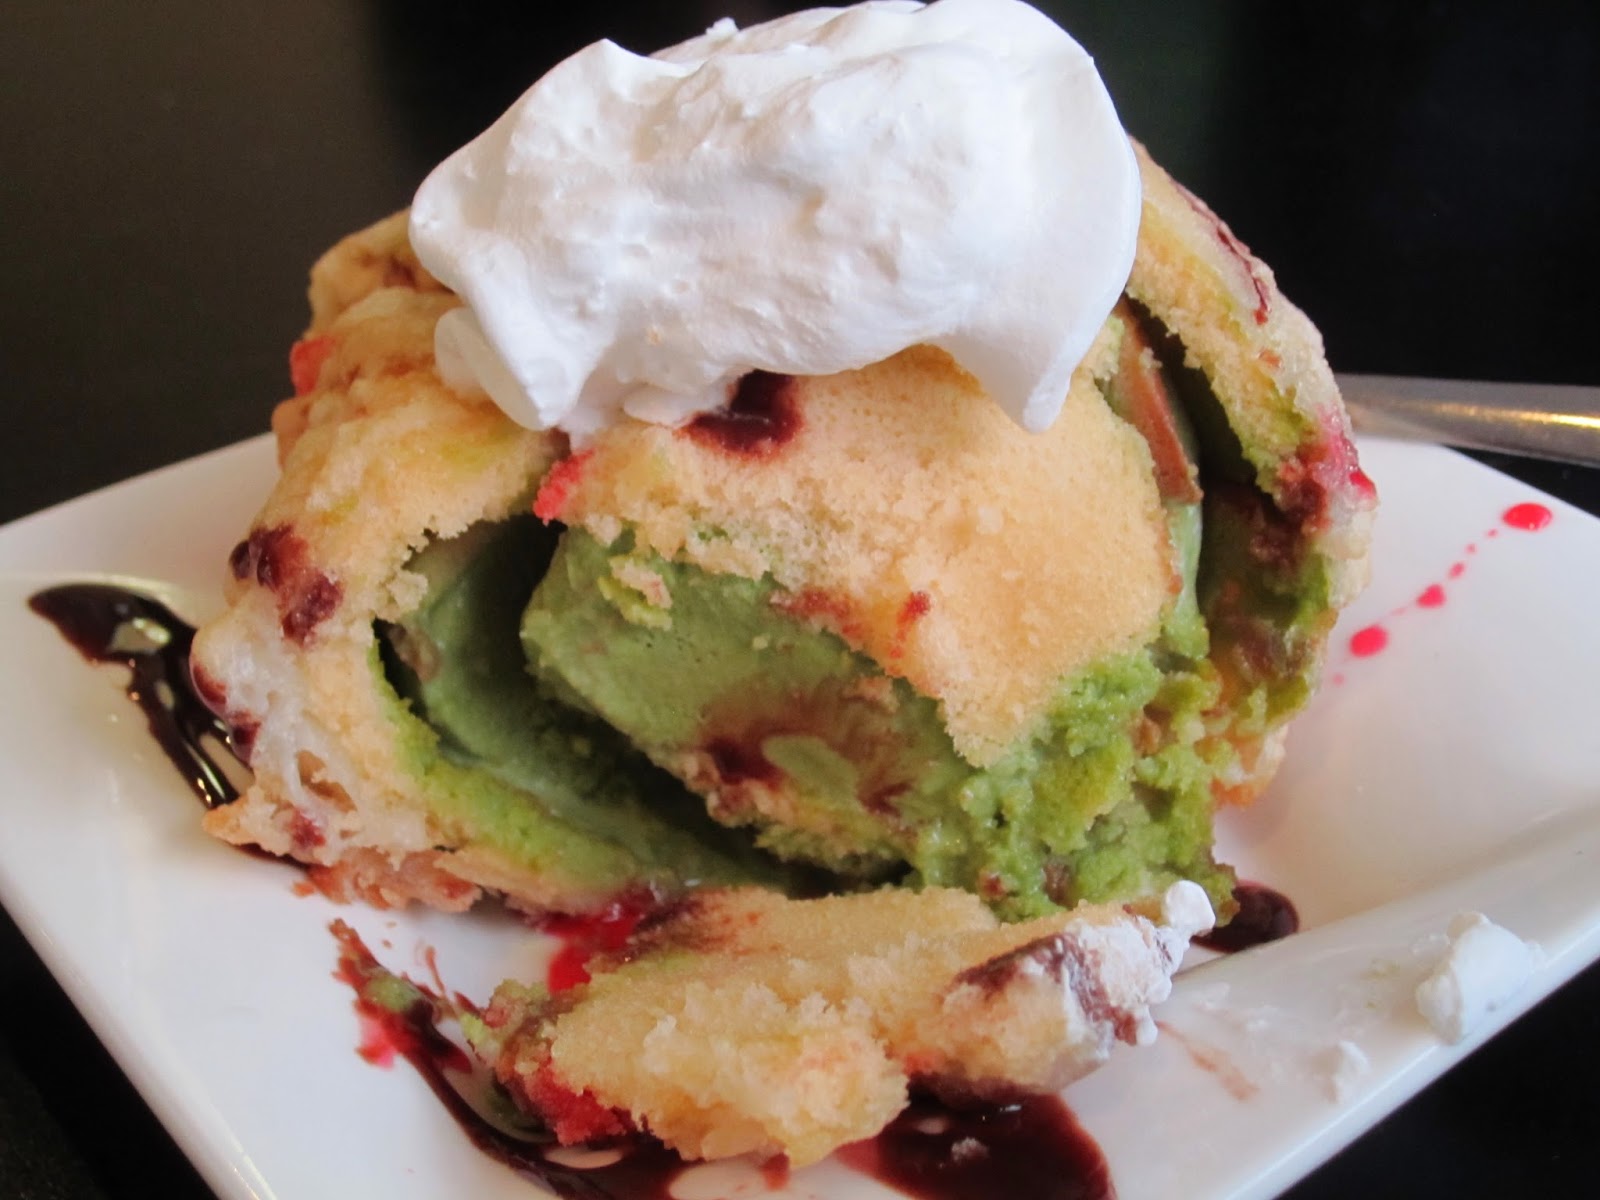
For dessert, I had their Green Tea Fried Ice Cream.  Wow.  I like fried ice cream, and I like green tea, but together...fantastic!


Yeah, as you can see, it didn't last long.  The tempura batter seemed just slightly underdone, but considering any longer in the fryer and the ice cream would have made it soggy anyway, I still give this dessert an enthusiastic thumbs up!  

If you go to Koto and want some fun entertainment, grill-side, I suggest getting a hibachi table.  You sit around a grill bar and watch the hibachi master cook your food to order while putting on a fantastically whimsical spectacle. The specialized chef shows off his/her awe-inspiring skills in a way that will make you smile and maybe even laugh out loud.  


Whether you choose to sit at a regular table and eat sushi, or around the entertaining hibachi grill, I recommend giving Koto a try.  They changed my perception of Japanese cuisine to something positive for my palette. Their prices are reasonable and their food is fresh and delicious!